Wednesday, July 3, 2013

Twist with Color


Can't wait to see how this color dries. I know it will not be as intense, but I suspect the silk can still take more color, so if need be I will add more.  Here is todays work on Twisting.


Monday, July 1, 2013

Twisting and Turning

It is incredibly humid with everything sticky. I was working on some new small triangles and made a few new deconstructed screens, but it was just too humid for anything to dry. I had a new piece of silk stretched and waiting. And luckily I just jumped in with an idea I had the other day. Why not just use a brush and paint black lines down on the silk? And so I did. 
I did a free drawing across the big square of crinkled chiffon. 


Once the silk was activated by the curving black lines I grabbed my newest favorite tool. "Roots only" and just went to town. Can't wait for it to dry enough to had additional layers tomorrow.


Sunday, June 16, 2013

Mono Prints

Had a good time this weekend working with my intern and showing her how to make monoprints using deconstructed screens on Reeves BFK.

We spent Saturday making the screens taking rubbings and drawing on the mesh with thickened dyes. We let them dry overnight and went off to buy the paper.

Any good printmaking paper will do.


This print had a second layer using a thermofax as well as being brushed directly on the screen. You will see remnants of these red stripes printed on the image below. The images are small... only 16"x10" so this moved along quickly.


These two images are fairly early in the print order you can tell because the hand drawn marks are mostly white. The dye was thicker there so it acted as a resist.

Both of these have a second layer added to them while they were still damp. The one to the right was brushed over and the circles were stamped on.


The print on the right shows more of the hand draw red lines they had begun to break down and so printed more than acting as a resist. This has shapes stamped and rolled on top.


Well not sure this might actually have been the third pull... since I think the red line is still acting more as a resist. I always mean to number the papers... maybe next time. Just like this process I tend to be very impromptu and improvisational.


Twas a great way to spend the weekend! Thanks for looking.


Big Day!

I finally got to see these panels hung as a unit the day before the wedding. Here they are as the guests are beginning to fill the white space. The panels were hung 3" apart and with the center panel hung 6" further forward than the two side panels. They are only lit with natural light in this photo and it was a very overcast day. But this shot gives a closer sense of their true colors.


Here is a view of the brand new Mr. and Mrs. I was tickled at how well the panels worked with the colors of the wedding party and for making this plain white space seem more spiritual.


Off to enjoy the party. For once I do not have dye on my hands!

So now all the excitement and work is complete and the panels are wrapped and stored under my print table  awaiting another opportunity. If you know of any couple that needs a backdrop let me know!
It was a wonderful day and a beautiful ceremony. 

Friday, May 17, 2013

Spring Beginnings/ June Wedding


Hello and Happy Spring from Studio 207!
Take a sneak peak into what was accomplished today!  The following 14 foot and 9 inch silk panel in front of you, is the first segment of a three-panel piece. This is the center panel and there will be a12.5' panel on either side. These will be hung at ceiling height from a 13.5' ceiling... so the dark green on the center panel will disappear into the folds as it gathers on the floor. It is my intent that this reference kimono. The flowers will extend across the top of all three panels... and extend further down on the right hand side. These panels will provide the backdrop for my daughters wedding this June. Her bridesmaids are wearing colors in this color range of the flowers.  This wall hanging was entirely hand painted, and rolled using  MX dye a small amount of soy wax resist in the flowers . Take a look for a visual explanation:
Rolling vertical stripes to create a sense of background and space. The background color of green, will appear subdued with the addition of the newly rolled purple-sage. The deep emerald at the bottom was deconstructed silk screen, but will not be visible when it is installed as the fabric will puddle on the floor.
 
 
This piece will stand nearly 3 times my size upon installation.  It's moments like these that require a ladder to gain a fresh perspective.
 
The variety of textures one can receive from 2 similar sponge rollers is always surprising!  The dark lines atop the larger stripes have been added, a more purpley-sage, to boost presence and volume of the stripes against the yellow background. 


Et Voila !

Friday, February 22, 2013

Double Your Pleasure

As the long gray days of February continue I am doubling my pleasure by creating and wearing multiple scarves at once.

Wool knit acid dyed itajime wrapped with Stone washed crepe screen, deconstructed and hand painted.
I love how this looks like a flower when wrapped. It is very comfortable and warm.

Each scarf has the same serged edging so those colors act to unify them. I also used the same acid dyes on each of them so they are linked in that way too. It was my first venture screening acid dyes and despite soaking in vinegar to avoid having the sodium alginate clump it still was more of a challenge to remove than it is with MX and soda ash. Part of that may be the surface of the stone washed crepe. I will have to continue to experiment.

Stone Washed Crepe
Wool Knit Jersey

The stone washed circle scarf is 72" and can be wrapped three times around your neck.


The wool knit jersey is shorter and can be wrapped twice.


Saturday, January 12, 2013

Faux Quilts

bubble chiffon, screen printed and painted with thickened mx.


After spending the last several months working exclusively on wool I decided to work on my two favorites silks from last season. This one is on tight twisted seersuker. It will be slightly crinkled when freed from the table, but doesn't wrinkle when packed or when it get humid.


tight twisted seersucker, screen printed and painted


My table is 5'x12' so I am able to work on two large squares at once.The prints and geometric shapes remind me of quilts.


beginning to overprint
completed overprint and brush stroke.

This one was overprinted with using a screen with a soy wax grass pattern. I also used the turquoise/emerald to paint a thin band in the center square.


bubble chiffon.
Meanwhile at the other end of the table I used the same colors but built it in a different way


This may look quite different when it drys. The final dark looking stripes are actually more of the chartreuse so we will have to see how much that shows up.  They look almost flag like to me. The chiffon has a natural texture that will bounce up once freed from being stretched on the table.


tight twisted seer sucker


Now it is the wait for them to dry so that I can steam them. They are made from liquid reactive dyes so steaming is required. Will post them when they are edged and made into scarves.
It has been a good way to get beyond January and day dream about the warmer days heading our way this spring.

Friday, January 4, 2013

Wool Shibori

Bomaki


Have been having a great time working with wool and acid dyes. Here is an example done by making a sleeve of this tropical weight wool and sliding it tightly down a PVC pole. Take it out, twist it a bit and then over dye it. This wool has a slight crispness so it holds its wrap nicely.


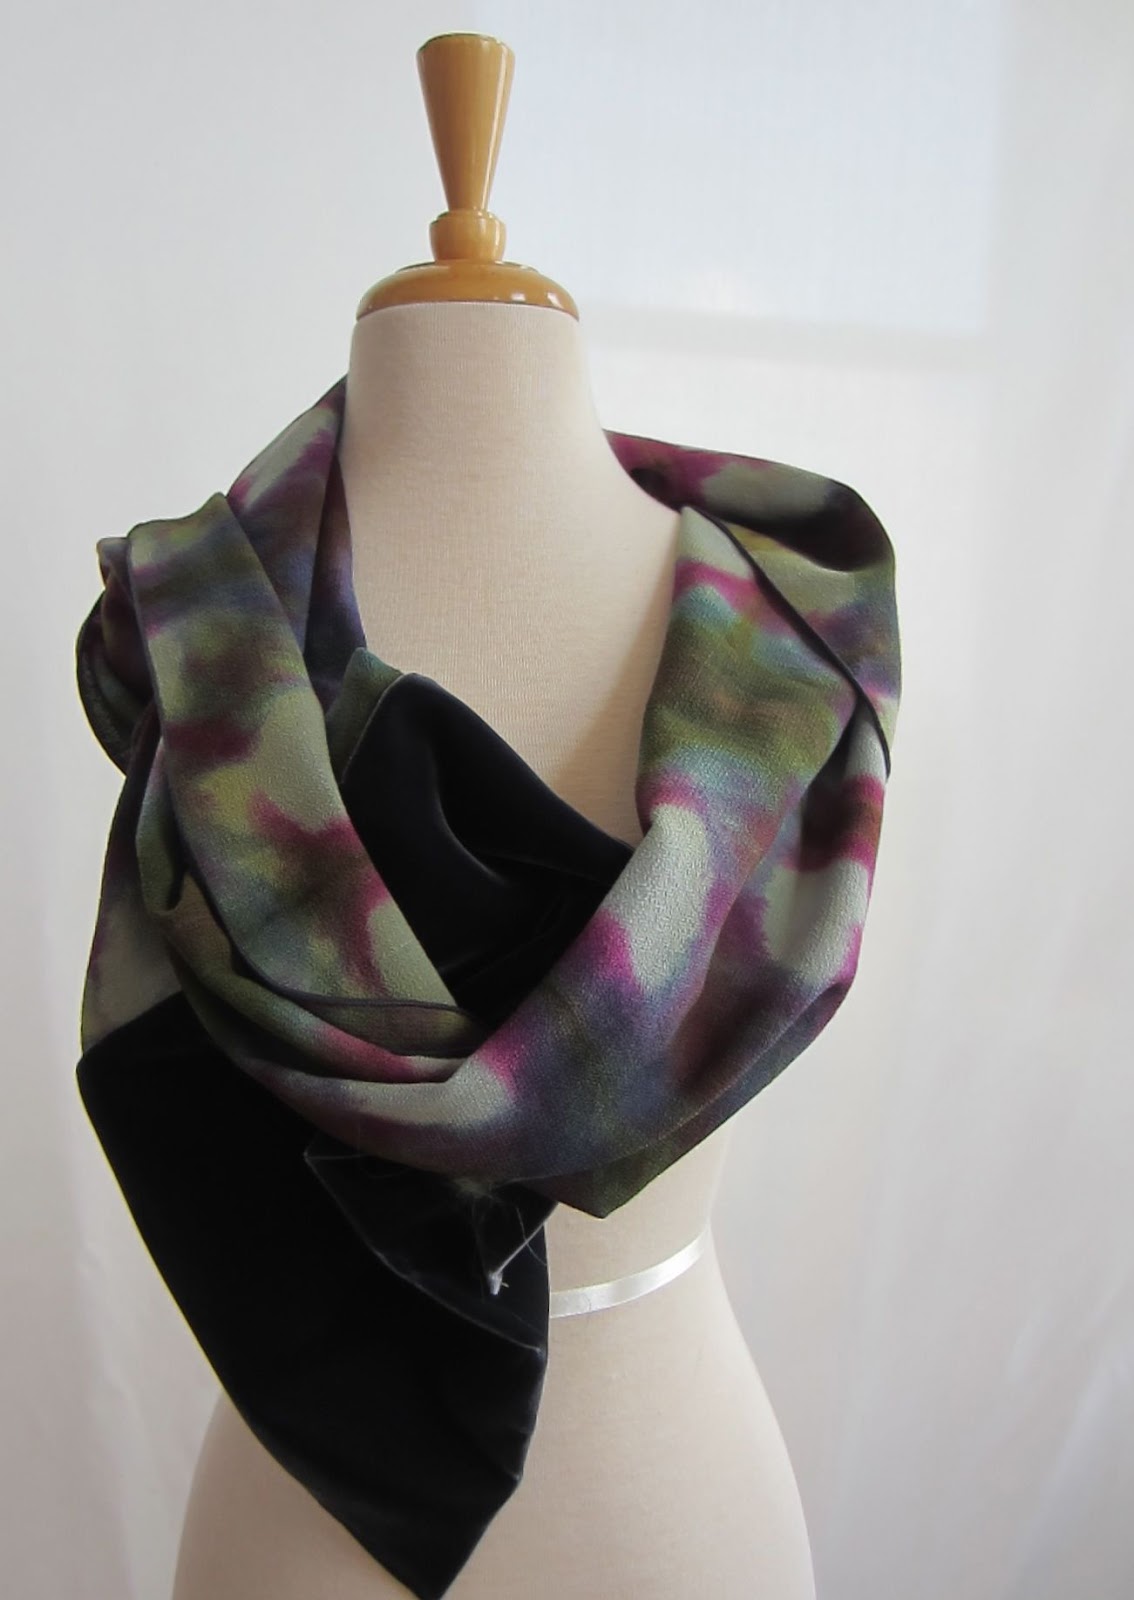
Tropical weight wool itajame with grey velvet.


This is itajime, shapes are clamped onto folded fabric and then dyed. I pieced it together with grey velvet.
Discharged wool knit, lined in silk charmeuse.


This was all that deep reddish brown and is a wool knit jersey. I gathered the width of the knit and bound it with string. It discharged to a disappointing bubble gum pink... so back into the pot to be over dyed a bit with a chartreuse which did the trick. It is lined in a luscious cream charmeuse  and has a grey silk caps on the ends. It is really lovely in MHO.
Tropical weight wool

Wool crepe and velvet. Itajime.


Bomaki tied in overhand knots and overdyed green.


I loved this one. It was still in the 80's when it was made last September and I sold it almost immediately. It went to a good home. I was using up old MX dye that I had and read that if you treated stale dye like an acid dye it would work. I have no complaints. I do love the serged edge on this one.
Itajime and tropical weight wool.


I love the way this one retains its folds while on the body.
Wool crepe italjime with grey velvet caps


Another of the wool crepe dyed with the old MX. Sold the same September day. I do hope it is out and about this cold January.


Wool knit itajame
Pieced wool chalis and silk

More wool kit


I learned this technique this summer from Elin Noble.. she is a great teacher. The grey and violet scarf above was made from this itajime technique.


Induction Hot Plate

Another thing I learned from Elin was what a joy it would be to invest in the induction hot plate. This puppy allows me to heat use 22+ gallon stainless steel stock pots full of dye in a flash. I don't think I would have been doing this work without it. 

Thanks for stopping by.


Thursday, January 3, 2013

New Prints...Wordless Weds. except it is Thurs.

2012 was a most productive and exciting year for me. I really mean to blog about it. But for today I will just put up some images that are in a one person show of prints on paper. They are all monotypes done with MX dye on Reeves BFK. I love the rich translucency that the thickened dye produces on this lush paper. 

 I think it is easy to see that these three prints were pulled from the same deconstructed screen. With each pull more of the dye is deposited on the paper. I also worked back into them with additional dye either brushed on or stamped.


 These three came from another screen


These last two are larger and from the same screen

I have another six waiting to be revisited. It is a wonderfully exciting process.