Monday, February 6, 2012

Scarf Update!

Hello readers!
So you've received an in depth look at how Dianne designs her silk scarves, but you may now be asking yourself what the last steps of execution are.  Lucky for you, she's kind enough to share :)

1. Ripping your precious silks!


2. Dianne carefully chooses a color scheme for her serged edges:


3. Et Voila!  The scarf, entitled, "Electric Cool Aid" is now ready for sale! 


Saturday, January 28, 2012

Nick Cave comes to Philadelphia!

Hello readers!

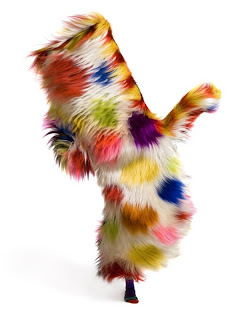
I hope that you've all returned with an eager excitement to see updates from our last post, however, today we are going to Nick Cave's show at the Fabric Workshop.  You may be thinking, "Well, what is the correlation here?"  Quite frankly, there is none--but we must go!  "I will kick myself if I don't make it over to Nick Cave's show today," said Dianne earlier.  We are calling it an early day in the studio to catch a glimpse of his infamous sound suits.  Updated pictures of the finished fabrics and also the serging process will be available to you on Monday afternoon.

Have a lovely weekend and please check back with us on Monday!

Francesca van Stolk
Guest Blogger
Studio Assistant

Well the best laid plans.... we didn't get there in time... the city was awash with Auto Show traffic. Will try again soon ... the show is up til Feb. 12.

Dianne

Sunday, January 22, 2012

A Day With Dianne

  
    Outside the warming brick walls of Dianne's factory-turned-artist-studio in Philadelphia, lies the remainder of the city's first snow fall of the new year. Slick ice and crunchy snow create a winter blanket under our feet.  Inside her studio, one can dismiss the freezing cold weather; walls are adorned with vibrant fiber wall-works measuring taller than both she and I, blooming orchids line the window sill, works of art both contemporary and historical patchwork the walls, and plush colorful chairs adorned in her own fibers invite you to sit in for a moment her world. 

     Today will be reminiscent of other productive days for Dianne, but for myself and her fortunate readers, it will be brand new; today, we take each of you along in the intimate moments that create these personal scarves.  Today, we share A Day With Dianne.

Preliminary Actions:
Before Dianne can create her scarves, many preliminary steps must be taken.
1. Soda-soak your silk!  This is a necessary process which allows the silk to accept dye.
2. Allow your fabric to air dry.  Do not rinse out the soda soak!
3. Pin your fabric taughtly as pictured below.  It should be tight like a trampoline. 
4.Pre-select where divisions will be made for your scarves.  Today, we have marked these areas by creating a border.

5.  Today, Dianne is using a deconstructed silkscreen.  This screen was created at an earlier date for silkscreens often take hours to dry.  Print paste has been mixed with her color of choice, and is then used to transfer the screen's image.

 6.  Pictured Above, Dianne places a straight-edged piece of plastic over her borders to allow herself the freedom to print over them.

7.  Because there is now a perfect print of her screen on the plastic, Dianne instinctively flips over the plastic and uses a rubber roller to transfer the image; many actions like this are taken in her studio to avoid wasteful consumption.  This particular decision allowed Dianne to receive a hue much lighter than she would have received with direct silkscreen.  Over time, decisions like these contribute to her repertoire of how to effectively manipulate her materials. 


8. Accent details are applied by hand to merge the color relationships.
 9. Very often, new colors are brought in that were not used in the initial border or screen.  Here is the first phase of adding color:


10.  The second phase:


Check back with us shortly to see the final results post-washing, ironing, and sewing!
Want to know more? Me too! Contact Dianne for workshop availability and/or private appointments at: dhricko27@gmail.com

Until next post,

Francesca van Stolk
Guest Blogger


Thursday, January 19, 2012

Poster Child

Post Card for Art Cloth Network Show
I am so tickled that "Bebop" has been selected to be the Poster Child for the Art Cloth Network show. This show will feature the works of 15 members of the Art Cloth Network and will be part of FiberPhiladelphia.

Any one with in interest in fibers should immediately stop reading this blog and go right to www.fiberphiladelphia.org and get the latest updates on what is happening.  Then get yourself to the city of brotherly love and see us getting our fiber on.


Saturday, January 14, 2012

New Toys

I was invited to post to pinterest and so of course had to give it a whirl. Now I am trying to change an image that is on my website, but in a very rectangular format. So am putting it here so I can transfer it there. All part of my steep learning curve. Will report back if I am successful.  Well got it this far. So we will see.

After some thrashing about I called my much more computer literate studio assistant and with several clicks it was accomplished. Of course I have not learned how to do it yet, but that may come. So if you have time to spare go visit Pinterest and look for Dianne Koppisch Hricko. Happy New Year!

Saturday, November 26, 2011

More Pole Dyeing.

hand under-pained in blue/ warm yellow and cool yellow
over dyed with red
As we were getting ready for lunch on Saturday,  Jan suggested that we freely under-paint a piece of cotton that was not soda soaked. We then had to let it batch over night and we would dye it the next day. These unfixed pieces were forbidden in the work room... they stayed in the hallway until we were ready to dye them again.

I used a foam brush and blended the cool yellow warm yellow and blue throughout the piece.

The next day I folded it randomly in thirds diagonally and pushed it down the pole without strings. It was over-dyed with a strong red. Since the batched  dye was not fixed Jan referred to these dye sessions as dirty dyeing as you could pick up stray dye from someone else work. I never noticed it.


folded in half, wrapped diagonally on pole,
twisted  and wrapped with string
This piece shows the way the dye gets lighter on the inner layers of the wrapped fabric. The string makes the crisper marks rather than the more organic marks that occur when you just push it down and compress the fabric without wrapping with string.


over dyed  string
wrapped with a masking tape mask
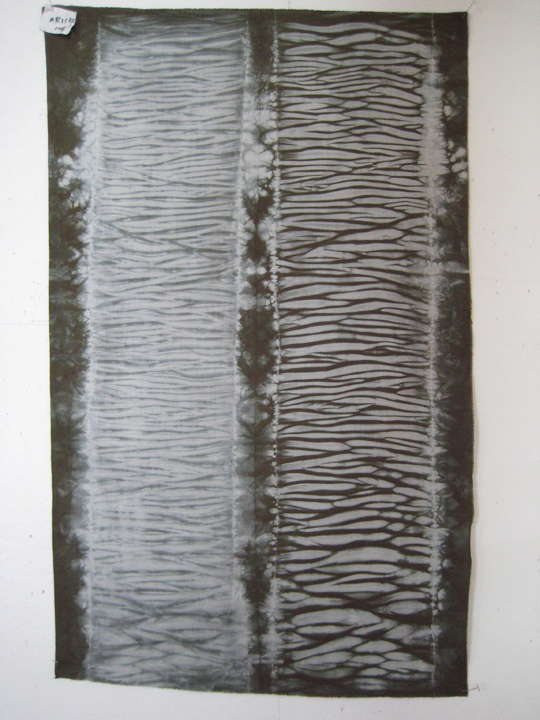
Sunday we were encouraged to play and try lots of ways of making resists. Here is one of my favorites. The lighter blue stripes occurred when I put masking tape over a pale teal from Sat. and then dyed it in a rich brown. It was rolled onto the pole horizontally and compressed without string. I wold love to see this in wool... but have NO experience in dyeing wool.

folded in half and stitched to make a sleeve
 then pushed down the pole
Jan also brought along an ancient Singer portable machine and showed us how to use it to make sleeves to fit the poles. You could make several sleeves on one width of fabric... but I didn't get to that. I did plan one out on my commute home Sat. night and was pleased that I had actually been fairly accurate in my visualization. I do think this would be great in a raw silk for a man's scarf.


There are many more samples, but this gives you a sense of what happened. It was a terrific class and even more fun was a bit of reunion as three ArtCloth Network folks were there. I wish I had remembered my camera as my class mates did some spectacular work.

Friday, November 25, 2011

Pole Wrapping Workshop with Jan Myers Newbury

I had the great pleasure of spending last Saturday and Sunday in Newark with Jan Myers Newbury and 12 other students. Jan's two day workshop was terrific. She really got us going right away and her knowledge and organization made this an amazingly productive workshop.

wrapped diagonally and twisted as it was pushed down the pole
We began by learning what I believe she called a down and dirty method of basically wrapping fabric around an pole, putting rubber bands on the bottom to keep it from sliding off and then pushing the fabric down to tightly compress it. No wrapping just pushing. This produces a much softer series of lines than wrapping with string, but is so fast and easy that it was shocking, almost effortless.

Jan had us working in teams and we each were able to dye a minimum of 4 poles during each dyeing session. She has a chart set up for each dye session that breaks down the dyeing time into 15 min. sections so that the washing soda is added at the correct time and all pieces are agitated in a timely fashion. She also provided us with recipes for all the colors we were using.

Rolled on to the pole vertically and pushed straight down.


There are so many possible variations with just this one simple technique that I can barely begin to think about all that is possible.

We were all working with cotton which is not at all usual for me. I really look forward to trying this with a variety of silks. Jan usually uses her fabrics to make quilts and says she really does not like sewing silk. I was curious about her banning of silk for this workshop and her explanation made perfect sense. She wanted us to all have color samples to go along with her recipes and silk does not dye the same colors as the cotton.  She also mentioned that the molecules are attracted to silk in a different way than to cotton, but this I am not so clear about.


Next we were encouraged to try incorporating different folds in our pieces. The one below shows a very random fold. I think I may have done it something like folding a paper envelope.
 You are only seeing the outer parts of the wrapping as I had folded it in half and over dyed the lighter half of it.
Folded randomly and pushed down pole