Outside the warming brick walls of Dianne's factory-turned-artist-studio in Philadelphia, lies the remainder of the city's first snow fall of the new year. Slick ice and crunchy snow create a winter blanket under our feet. Inside her studio, one can dismiss the freezing cold weather; walls are adorned with vibrant fiber wall-works measuring taller than both she and I, blooming orchids line the window sill, works of art both contemporary and historical patchwork the walls, and plush colorful chairs adorned in her own fibers invite you to sit in for a moment her world.
Today will be reminiscent of other productive days for Dianne, but for myself and her fortunate readers, it will be brand new; today, we take each of you along in the intimate moments that create these personal scarves. Today, we share A Day With Dianne.
Preliminary Actions:
Before Dianne can create her scarves, many preliminary steps must be taken.
1. Soda-soak your silk! This is a necessary process which allows the silk to accept dye.
2. Allow your fabric to air dry. Do not rinse out the soda soak!
3. Pin your fabric taughtly as pictured below. It should be tight like a trampoline.
4.Pre-select where divisions will be made for your scarves. Today, we have marked these areas by creating a border.
5. Today, Dianne is using a deconstructed silkscreen. This screen was created at an earlier date for silkscreens often take hours to dry. Print paste has been mixed with her color of choice, and is then used to transfer the screen's image.
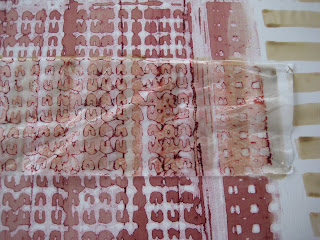
6. Pictured Above, Dianne places a straight-edged piece of plastic over her borders to allow herself the freedom to print over them.
7. Because there is now a perfect print of her screen on the plastic, Dianne instinctively flips over the plastic and uses a rubber roller to transfer the image; many actions like this are taken in her studio to avoid wasteful consumption. This particular decision allowed Dianne to receive a hue much lighter than she would have received with direct silkscreen. Over time, decisions like these contribute to her repertoire of how to effectively manipulate her materials.
8. Accent details are applied by hand to merge the color relationships.
9. Very often, new colors are brought in that were not used in the initial border or screen. Here is the first phase of adding color:
10. The second phase:
Check back with us shortly to see the final results post-washing, ironing, and sewing!
Want to know more? Me too! Contact Dianne for workshop availability and/or private appointments at: dhricko27@gmail.com
Until next post,
Francesca van Stolk
Guest Blogger


No comments:
Post a Comment